Mini Floodlight
It's been way too long since my last post, but now's better than never. I bring you the Mini Floodlight, named after a friend who was half blinded by it. This project was inspired by the youtuber, DIY Perks, who made this insane version of the floodlight. Mine was done on the cheaper side with 3d printed parts holding everything together. Put together, the light looks like a miniature sun.
Parts


- 100 Watt LED
- DC-DC Voltage Booster
- Main Body (heatsink + lens + cooling fans)
- XT-90 connector
- 12v Battery (same one I use)
- Some wires
- A switch
- 3d printed parts
* above are affiliate links if you wish to support me
Wiring Schematic

Here is a very simplified version of the wiring layout for the floodlight. You'll have to use your imagination since I had to substitute a few parts since they didn't exist in the parts library. Imagine the breadboard is the DC-DC 12v-32V converter. The green screw terminal is the equivalent of my blue one. The small red LED represents the bright 100W LED. The fan in the schematic is the cooling fan attached to the back of the floodlight. And the small lipo battery connector is the XT-90. Refer to the pictures in the next step when wiring the potentiometer. Wire colors in the schematic match the photos.
Assembly
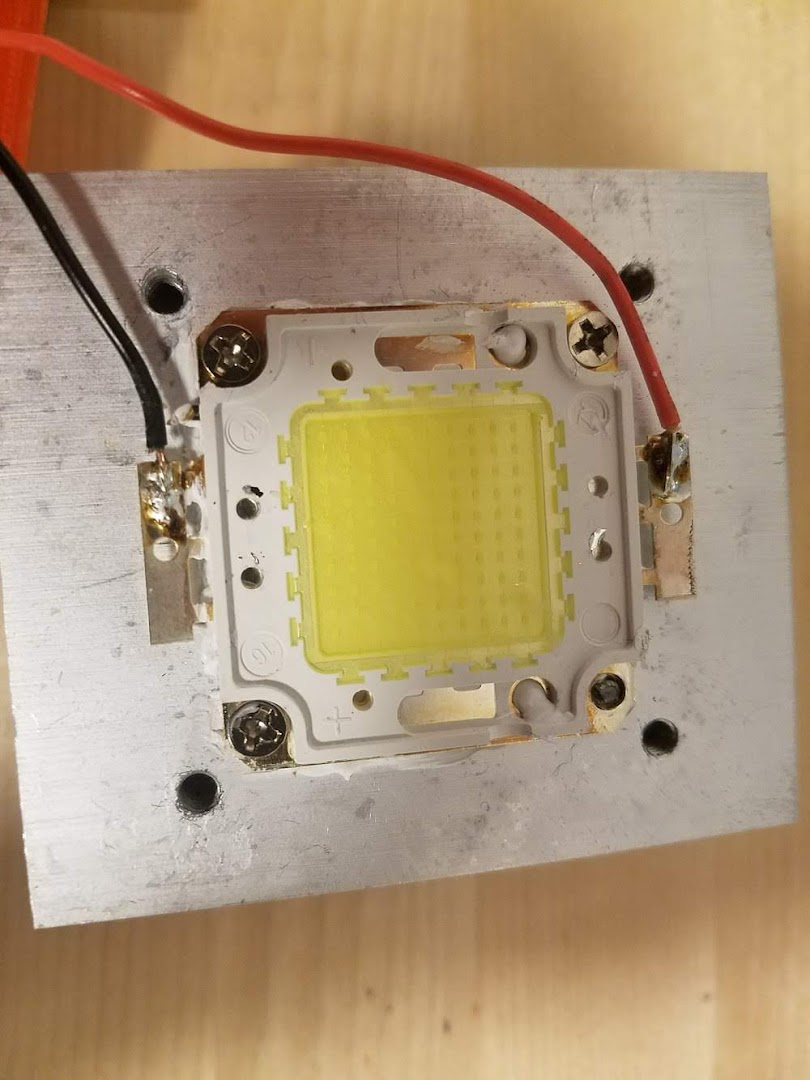


- Apply thermal paste to the back of the LED. Since it warms up very quickly, you want the heat to be dispersed by the aluminum heatsink. Looking closely at the LED, you can see a "+" and "-". With the "+" on the bottom, the terminal to the right is positive and left is ground. The lens can now be assembled. Fit the two 3d printed plates on before screwing in the four outer screws.
- Screw or hot glue the DC-DC booster with the blue terminals facing the two wire holes.
- Solder a single black wire to the ground of the XT-90 connector. The flat end is positive and oddly shaped side is ground. Solder a short red wire to the positive end of the connector, and solder the other side to one end of the switch. Solder another red wire to the middle pin of the switch.
- Solder the red and black wires from the fan to the red and black wires from the XT-90 connector. Pass both free wires through one hole of the 3d printed plate and clamp into the blue terminal. Do the same for the wires connected to the LED The left side is for input voltage and the right side is the output voltage.
- There are four slots on the top plate, next to the voltage booster, for velcro straps or zip ties to strap the battery in.
- (Optional) There is a blue potentiometer opposite the blue terminals. The voltage can be adjusted with a screwdriver, but I like to vary the brightness of the light. I used a 10K potentiometer with a knob large enough to easily adjust the brightness.
- (Optional) The 3d printed bottom plate is a tripod adapter for 3/8" threads. Plastic is self-threading, so turn the tripod thread until it fits in snugly with the printed piece.
Practicality


This is probably the most practical thing I've made so far. Every photo on my website is taken with this light shining in the background. The tripod adapter is extremely useful. I've been asked multiple times how long the light would last, so I finally got around to measuring the current draw. I used a Battery Life Calculator to estimate the battery life. As pictures, they kind of look the same, but I promise the light is getting brighter.
With a 2200 mah battery at 12v, I get the following
- 0.5 A ~ 3 hours (I usually use this brightness for my photos)
- 1.54 A ~ 1 hours (I use this for larger shots like videos)
- 4.00 A ~ 30-40 min (max brightness)
This project would have been posted a lot sooner if I hadn't been distracted by improvements to the 3d printed parts and other projects. I've been addicted to the making of coffee lately, so some of my projects will involve making better coffee. Very soon I will have my electric coffee grinder using a planetary gear up, so stay tuned.